|
Love Your Suds small batch, artisan, handmade soaps Blog Vancouver BC Canada
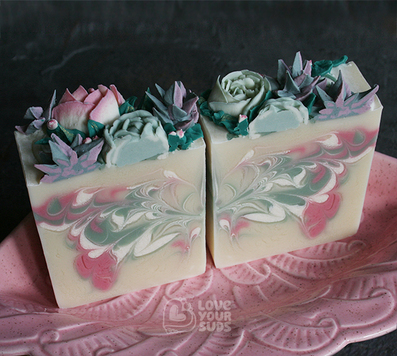
As a passionate newcomer to the art of soap making I delight in every opportunity to learn and practice. A few months ago I signed up for the Soap Challenge Club where members receive a monthly tutorial curated by soap artist, Amy Warden. This month's challenge is to create a soap using piping; a technique used in cake decorating to shape buttercream icing into swirls, rosettes and other floral embellishments. I was excited to give it a try. The rules for the September Soap Challenge include:
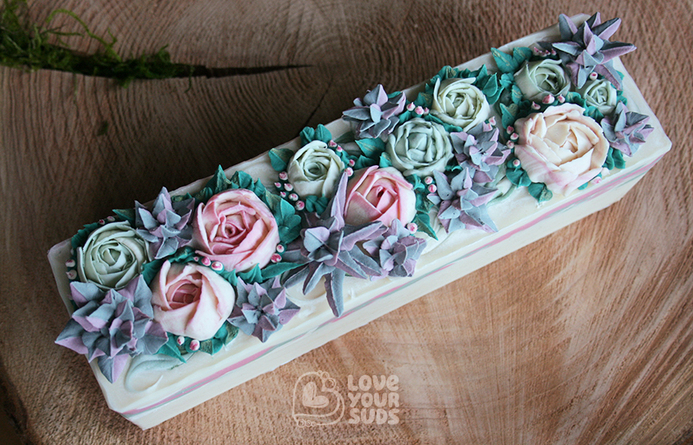
Inspired by Amy's tutorial and the advice of the featured soap artists, I launched into a YouTube marathon, watching numerous videos on piping with buttercream icing. This helped me get a feel for the process including how to hold the piping bag, when to apply pressure and when to pull away. While observing the cake decorators at work I fell in love with the look of piped roses and succulents. I decided they would be the focus for my challenge soap which would be scented with a lovely mix of rose fragrance oil (FO) and ylang ylang essential oil (EO). The next step was to formulate the recipes. I decided to break the project into two batches created over two days. On day one I would pipe the roses and succulents. On day two I would pour the base and add the embellishments. This approach would allow plenty of time for me to learn and practice while testing multiple recipes.
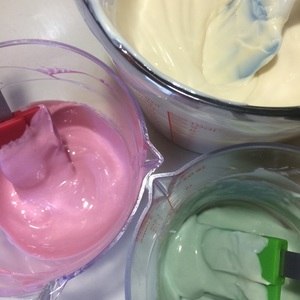
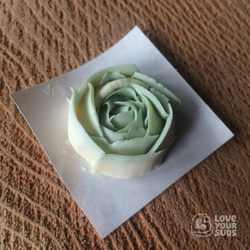
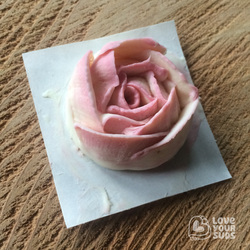
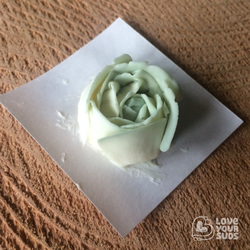
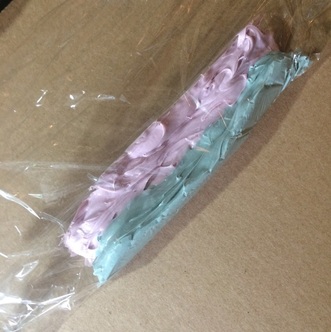
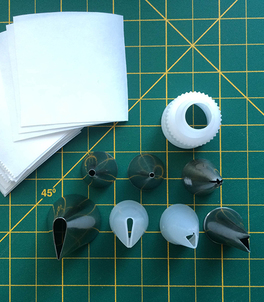 First up were the roses and I wanted to create two styles: white with pink edges using piping tip #104 and white with green edges using piping tip #102. I prepared each bag by aligning the narrow end of the piping tip with the bag seam, then smoothing a thin column of coloured batter along the seam before filling the rest of the bag with white batter. With piping nail in hand I was ready to begin and that’s when the nerves started to kick in, but they soon faded away as I realised that any imperfections in technique or inconsistency in petal size resulted in a more natural look which I loved. By the third rose I had relaxed and began embracing the process.
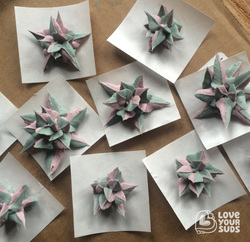
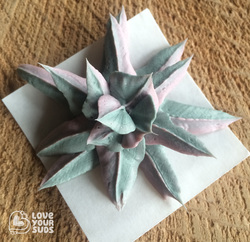
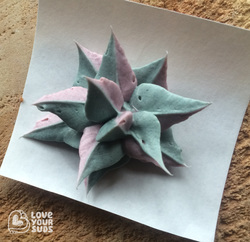
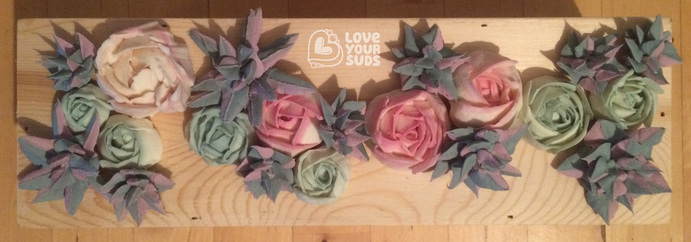
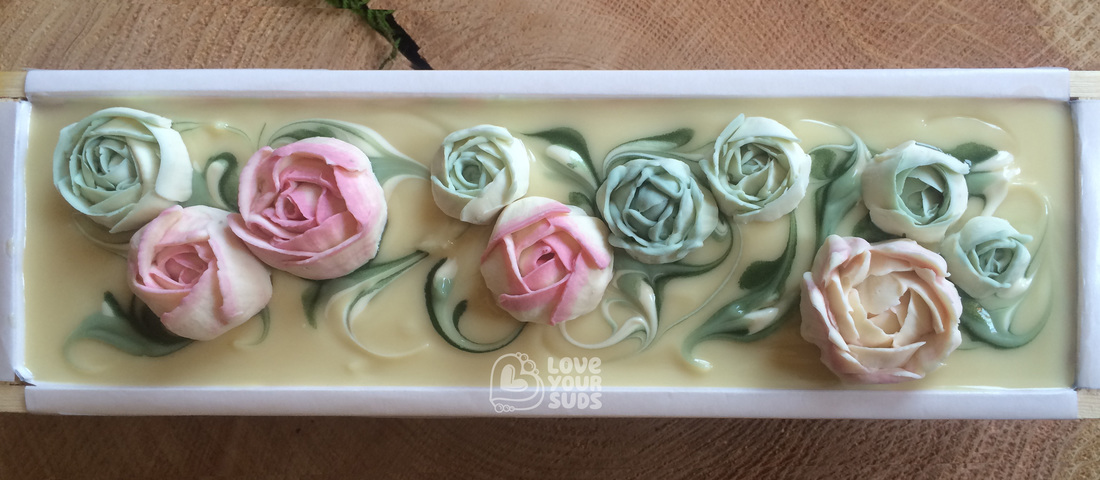
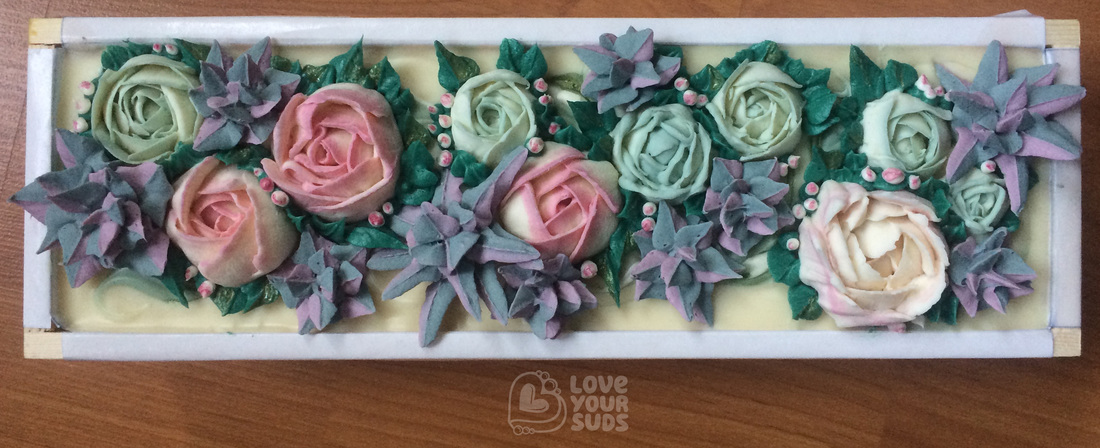
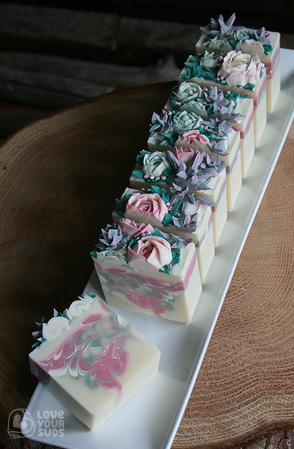
With the roses and succulents complete I was done soaping for the day with plans to continue the following morning. I took some time that evening to consider the composition and cut lines. I also wanted to make sure the finished loaf would fit into my mitre box cutter when the loaf was laid on one side. Once the roses an succulents had firmed up I used the bottom of the mold to map out the general positioning of each element. 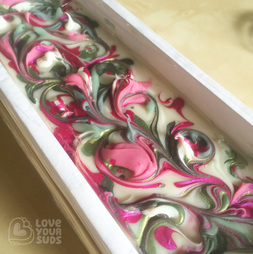 Session 2: Pouring the base & placing the decorations I had a butterfly swirl in mind for the base with a hand swirled top. I thought this might work nicely with the roses and succulents – a garden theme. For this recipe I dropped the shea butter ratio to 12% and removed the water discount. I think I might have added the fragrance too early and/or stick blended for too long. Either way the batter firmed up too fast so I decided to create a different soap that I named La Belle Rose and planned to try making another base for my soap challenge soap later that day. For the next try I made a few adjustments and included sandalwood EO in the rose FO and ylang ylang EO mix, which I then added to the soap batter after colouring and just before pouring. This made a world of difference and once the base was poured I began placing the roses directly on top. I really like the look of the swirls with the piped roses ... ... but this is a piping challenge, so I continued by adding the succulents. Next, I mixed more colours with the remaining batter from the base pour (I made a little extra) for the final details. I went with deep green, deep green with extra mica, dark pink and white. I set the coloured batters aside to firm up, stirring every five minutes as suggested by featured soap artist, Carolyn Newton and within 30 minutes the batters were ready to pipe. With the two dark greens I piped a variety of leaves and bud bases using three leaf tips and a small round tip. This time I used a coupler on my piping bag so I could switch out the tips on the fly. Next, I striped a fresh piping bag with lines of dark pink before filling with white. I used this to pipe the rosebuds with a small round piping tip before setting the loaf aside to cure. After two days of anticipation the soap was ready to cut. I was excited to inspect the butterfly swirl and to see how it looked with the piped soap embellishments. With a slow steady hand and a sharp knife I mapped out the cuts and sliced away, and what a delightful reveal! This is my favourite soap creation so far. It did take a long time to create, but I hardly noticed as I thoroughly enjoyed the process. I will definitely be piping soap again soon. Big thanks to Amy and the soap artists who contributed to this month's tutorial! It was so much fun. And best of luck to this month’s soap challenge entrants. I cannot wait to see your wonderful creations and to hear about your process. The feedback, advice and support given within the community is so inspiring and truly valued.
36 Comments
Carolyn
14/9/2016 01:13:02 pm
Belinda, this is absolutely stunning! I love your choice of colours and the fragrance sounds lovely. Very well done on your gorgeous soap. I love the swirls inside too💕
Reply
Yvonne
14/9/2016 02:04:48 pm
Belinda this is so lovely! And that cut! WOW!! Great job!
Reply
Belinda
15/9/2016 07:24:13 am
Thank you so much, Carolyn! I really appreciate your feedback :) xo
Reply
Belinda
15/9/2016 07:27:34 am
So nice of you to stop by and say, Yvonne! <3 I really took my time when cutting this one :)
Cheryl W
14/9/2016 02:14:33 pm
Great job on this gorgeous soap! I really enjoyed reading your blog. Not only is the top beautiful, but the butterfly swirl is amazing too!
Reply
Belinda
15/9/2016 07:30:35 am
I am so glad to hear, Cheryl, thank you :) xo I had fun with this one and it's my pleasure to share my experience. Happy soaping!
Reply
14/9/2016 05:31:51 pm
This is stunning, Belinda! All of the elements really came together beautifully! The colors and shapes look positively professional. Thank you for documenting your process so thoroughly as well. I'm so glad you were able "relax into the roses!" :)
Reply
Belinda
15/9/2016 07:32:19 am
Thank you so much for your feedback, Amy! It means al lot to me <3 I really enjoyed this challenge and I'm looking forward to the next one :)
Reply
Toni Jackson
14/9/2016 07:47:20 pm
This soap is gorgeous. I love your colors. Great Job!!
Reply
Belinda
15/9/2016 07:33:28 am
Thanks for your kind words, Toni! xo
Reply
Omneya Andrea Acosta Dhmaid
15/9/2016 09:17:39 am
Love succulents! You did an amazing job and happy you enjoyed the experience
Reply
Belinda
17/9/2016 07:24:51 am
Me too! They really are one of my favourite plants. Thanks so much for your note, Omneya! xo
Reply
Belinda
17/9/2016 07:28:33 am
Thanks you so much Cheryl, that's so nice of you to say! <3 I have been practicing and learning so much, particularly through doing the soap challenges in recent months. I still have lots to learn and I'm loving the process, and the journey.
Reply
Helene
16/9/2016 05:09:54 am
Beautiful soap!! Both on the inside and out! I really enjoyed reading about how you created it! Great job! :-)
Reply
Belinda
17/9/2016 07:31:55 am
Thank you so much for the lovely feedback, Helene and I am happy to hear you enjoyed the read. Happy soaping! xo
Reply
Belinda
17/9/2016 07:35:34 am
Thank you for feedback and wishes, Yvonne! All the best and good luck to you as well! Love your work xo
Reply
18/9/2016 09:08:36 am
Your soap loaf is just Beautiful! Love your flowers, You are very talented.
Reply
Belinda
19/9/2016 03:23:29 pm
That's kind of you to say, Rhonda, thank you!
Reply
Lisa
18/9/2016 04:18:43 pm
I love how you your two-toned succulents turnen out!
Reply
Belinda
19/9/2016 03:24:59 pm
I'm glad you like them, Lisa! Thank you for saying :)
Reply
Masako
19/9/2016 01:54:19 am
Your soap looks beautiful and your butterfly swirl is to die for! I love your piped succulents, too! Wonderful job!
Reply
Belinda
19/9/2016 03:31:32 pm
Thank you so much, Masako! I'm so glad I had another try at the butterfly swirl before applying the piping. It was worth the extra time and effort.
Reply
Belinda
21/9/2016 06:37:40 pm
Thank you very much, Lisa! :) This batch was fun to work on
Reply
20/9/2016 09:07:52 am
Absolutely beautiful soap. Love your colours, and the piping is perfect.
Reply
Belinda
21/9/2016 06:39:58 pm
I am so glad to hear, Carol :) Thank you muchly and happy soaping!
Reply
22/9/2016 08:27:26 am
I love your gorgeous soap! So much time involved, but the outcome says "truly artisan"...
Reply
Belinda
22/9/2016 10:04:39 pm
Thank you so much, Joan! it was totally worth the time and I loved every moment of it :)
Reply
22/9/2016 11:00:51 am
I want to express how lovely your soap is an your explanation of the process will help me as a beginner. Thanks
Reply
Belinda
22/9/2016 10:08:02 pm
I am so happy to hear, Diane! Thank you for your feedback and I am more than happy to share my process – I am glad it will be helpful to you.
Reply
This is SO exquisite! It must have been difficult to cut and yet each piece looks beautiful alone too.
Reply
Your comment will be posted after it is approved.
Leave a Reply. |
About the authorBelinda Williams is a creative at heart who loves to practice the art of soap making. Archives
June 2020
Categories |
|
Copyright © 2017-2023 Love Your Suds.
|

