|
Love Your Suds small batch, artisan, handmade soaps Blog Vancouver BC Canada
My soap making journey continues, and this month as a member of the Soap Challenge Club I had the opportunity to learn and practice a new technique call The Secret Feather Swirl; a lovely technique that it emulates either a feather or a tree depending on how you approach it. I knew this would be a tricky technique so I allowed myself plenty of time to practice and explore different recipes, colours and designs within the guidelines of the challenge, which included:
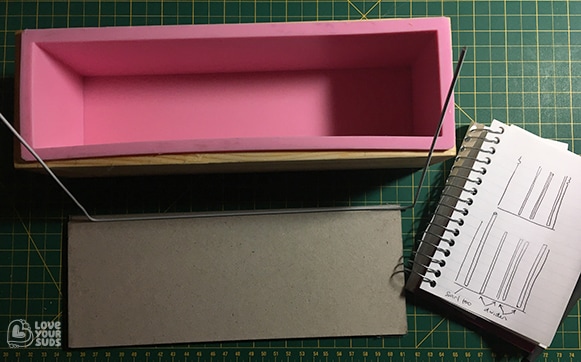
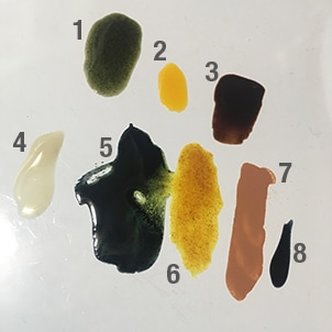
Attempt #1: PracticeFor my first attempt my only expectation was to practice, so I decided to create as many elements as possible within the one soap. This would allow me to test out both The Secret Feather Swirl and The Reverse Feather Swirl. I settled on a three row setup to create three design elements; one tree and two feathers. After some consideration and planning I devised an approach that required four dividers (see illustration below). This would enable me to create a little space between each element to help protect them when the dividers were removed from around the feathers. Next I cut four dividers out of 3 mm stiff cardboard (the kind found on the backs of art paper pads) before “mummifying” them with clear packing tape. This would help repel moisture while making for easier removal from the poured soap. A mold and a wire swirl tool (made from a coat hanger) were the final additions to my tool preparations. The next thing to tackle was deciding which colours to use and to help me decide I tried mixing up some natural colourants to get a feel for each of them.
I really liked the look of the white kaolin clay for the main colour, spirulina and cocoa for the tree with annatto infused olive oil and indigo powder for the feathers. I also decided to go fragrance-free on this attempt so I could focus on the colours and technique without fear of the trace speeding up. Clays That Contain Micas – are they considered synthetic or natural? Initially I was excited to use the set of Brazilian clays that I own from Brambleberry. Not only do they create beautiful colours in soaps, they sound completely natural too. Upon closer inspection though I noticed that they contain mica colourants that are mixed in with the clay to achieve their pretty colours. The guidelines for this month's Soap Challenge indicated that micas are not permitted in the all-natural category. For that reason I steered away from using them, opting to use other natural colourants that I already owned; and some new ones that I purchased. Although it's still a bit unclear as to whether these Brazilian clays are natural or not, I am happy followed the guidelines when creating my challenge soaps. It pushed me even further outside my comfort zone and I had the opportunity to try out some new natural colourants that I will definitely be using again. Here's a list of the Brazilian clays I own from Brambleberry. Are they are 100% natural? I would love to hear from you what you think!
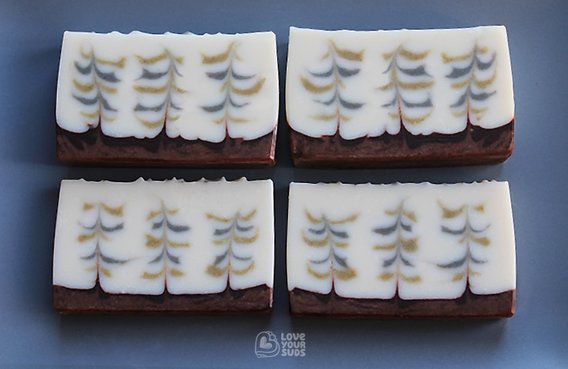
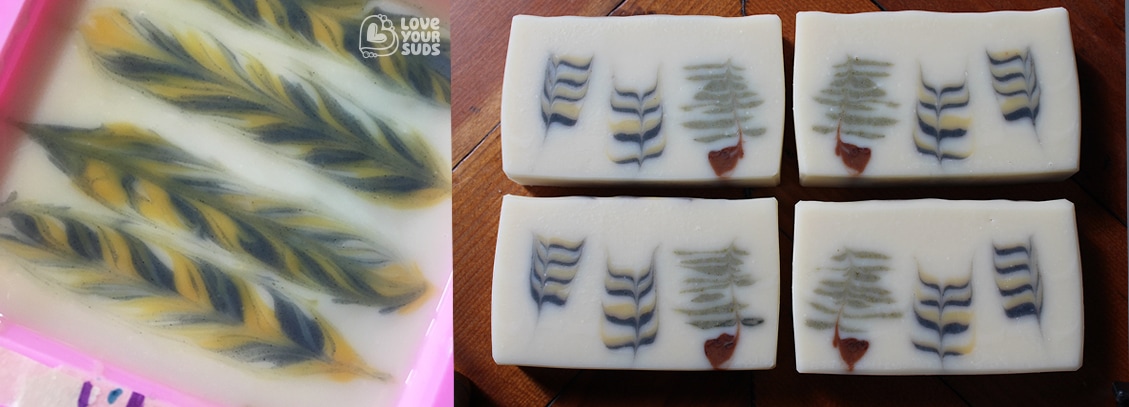
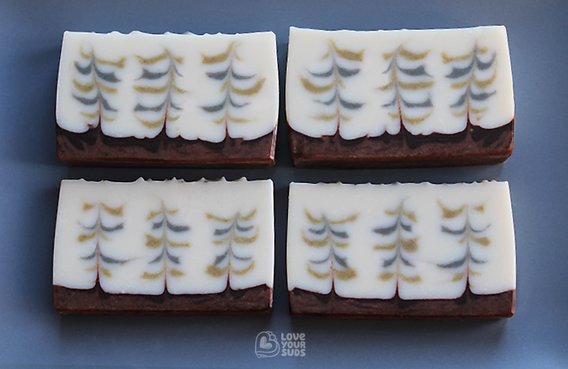
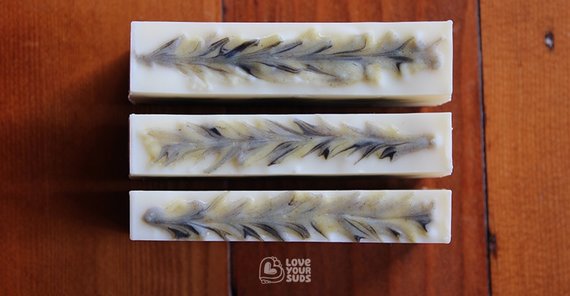
Before we go any further I wanted to mention; you know that terrible feeling you get when you think you might have lost the photos on your memory card before you have had a chance to download them? Well that happened to me and it turned out that some photos were lost. Lesson learned, but I wanted to mention this as I had some progress shots that I was looking forward to sharing with you here. Instead I will do my best to capture everything in words. When it came time to start soap making, I poured a layer of white batter (approx. 0.5 in) before placing the dividers, and setting the swirl tool on the bottom of the mold under where the tree trunk would sit. Next, I poured a layer of brown for the tree trunk using a squeeze bottle. I was now ready to start the layers. I had this crazy idea that if I started each element at a different time (i.e. staggering the start and finish of each element) it might be possible to position each element at different heights vertically through the soap. I started pouring the tree first by alternating between white and green. After a couple of rotations I began pouring the centre feather too, alternating between blue, yellow and white. After two more rounds of the tree and centre feather I began pouring the final feather. Once each element was poured the next step was to swirl the tree. To do so I slowly pulled the swirl tool up from underneath the tree and through the pours, trying to keep the swirl tool and the drag path as straight as possible. Once through the top of the soap I wiped the swirl tool clean and began slowly removing the dividers, being conscious of how the movement might effect the neighbouring design elements. Next I lined the swirl tool up with the centre of the middle feather (I had marked the side of the mold as a guide) and pushed the tool down through the soap until it hit the bottom. Then I dragged it along the bottom towards me and up along the edge of the mold until it was out of the soap. I wiped the swirl tool again before repeating this step for the second feather. The top was finished with a hand sculpted feather pattern using leftover soap batter and a skewer. Here’s how it turned out. Not too bad for my first attempt. Although the annatto yellow had faded, I was very happy with how the indigo blue, spirulina green and cocoa brown came through. Attempt #2: Rose clay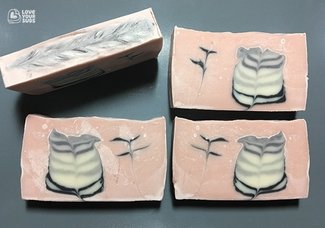 For my second attempt I wanted to explore a colour palette using rose clay, kaolin clay, indigo powder and activated charcoal. I decided to create a design with one feather and two birds in the sky, and well, let’s just say that one didn’t turn out quite as planned. I think I may have added too much rose clay because although I was using the same soap blend, the trace sped up rather quickly making it difficult to pour. I had to spoon it into the mold and when I removed the dividers a lot of batter came with them. I scraped off what I could and placed it back into the batch before repeating a hand sculpted feather design along the top of the soap; one feather for each of the cut soap slices. As you can see from the photo above, the finished soap developed quite a bit of soda ash, but nothing a little steaming won't clean up. I learned a lot from working on this soap. That's one of the things I love about it. I also love the design idea – I'm looking forward to trying this design again soon with some micas as colourants! Attempt #3: Pine ForestFor my third attempt I wanted to focus on the tree form, and was inspired to design a soap featuring a line of three trees. For this I would need three swirl tools and no dividers. I marked three evenly spaced points along both sides of the mold to indicate the centre of each tree before lining up each swirl tools with these points. 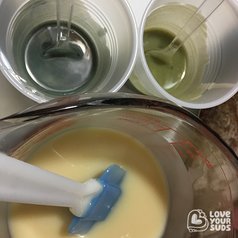 The next step was to figure out which colours I would use. Based on the strength of the colours in my first challenge soap, I decided to go with kaolin clay to whiten up the main soap batter. I would then create a two-tone brown using cocoa for the forest floor and tree trunks, and for the leaves/branches I went with a lighter green and a dark green, both made with mix of spirulina and indigo powder. Fragrance-wise I felt a foresty blend of eucalyptus, cedarwood, bergamot and lavender essential oils would be the perfect pairing for a forest themed soap. Once each colour was mixed, I poured the browns for the forest floor making sure to lay down enough batter so that it could be pulled up through the soap with the swirl tool to create a trunk for each tree. 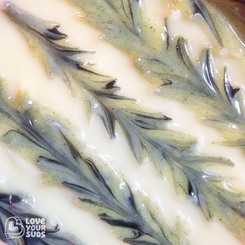 Next came the tree branches/leaves which were created by pouring lines of alternating colours starting with white, then light green, white again, then dark green, and so on, adding a pour of white along the edges of the mold and between each tree to help keep the trees as straight as possible. I continued this rotation along the three columns to create 10 pour lines per tree for a estimated total of around 46 pours. The final step was to slowly drag the swirl tools up and out of the soap. To finish, I sculpted a line of alternating pine needles along the top using a skewer and the two green coloured batters, with and a dash of activated charcoal here and there for contrast. And here they are! The final cut bars. I am so happy with how they turned out, and how much they remind me of BC, Canada. ... Now I did make one final attempt with a focus on the feather form. I named it, Light as a Feather and you can see it here. I really like how that one turned out – the practice really paid off – but how much I liked it contributed to a difficult decision: Which soap would I enter in the soap challenge? so I asked some friends and experts in the soap making community to share what they thought. I am so grateful for the conversations and for the valued feedback; it really helped with making my final decision. The degree of difficulty required to create the three tree design in Pine Forest, the lovely natural colours (some of which I had never used before), and the symbolic connection of the pine tree design to BC, Canada were among the deciding factors, making it feel like the most fitting soap for me to enter into the all-natural category for the March, 2017 soap challenge. All the best! Pine Forest |
About the authorBelinda Williams is a creative at heart who loves to practice the art of soap making. Archives
June 2020
Categories |
|
Copyright © 2017-2023 Love Your Suds.
|

