|
Love Your Suds small batch, artisan, handmade soaps Blog Vancouver BC Canada
No matter how busy the weeks become, I always find time to enjoy soap making. There is something about being creative and working with my hands that helps me to relax and unwind. Since July I have been participating in the Great Cakes Soap Challenge Club and this month was all about creating a soap that emulated a woodgrain pattern. Although I knew this month would be a busy time for me, I was determined to have a try at creating a soap for this month's challenge. The guidelines for the October soap challenge include:
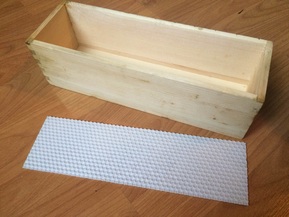
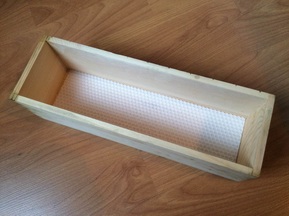
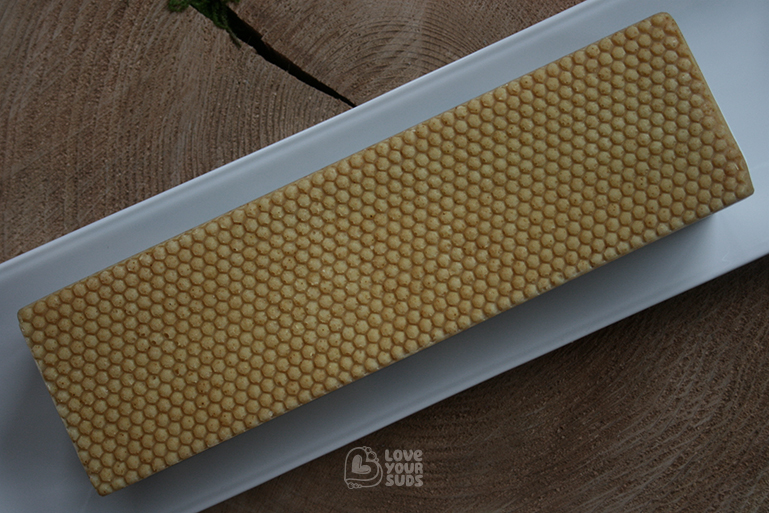
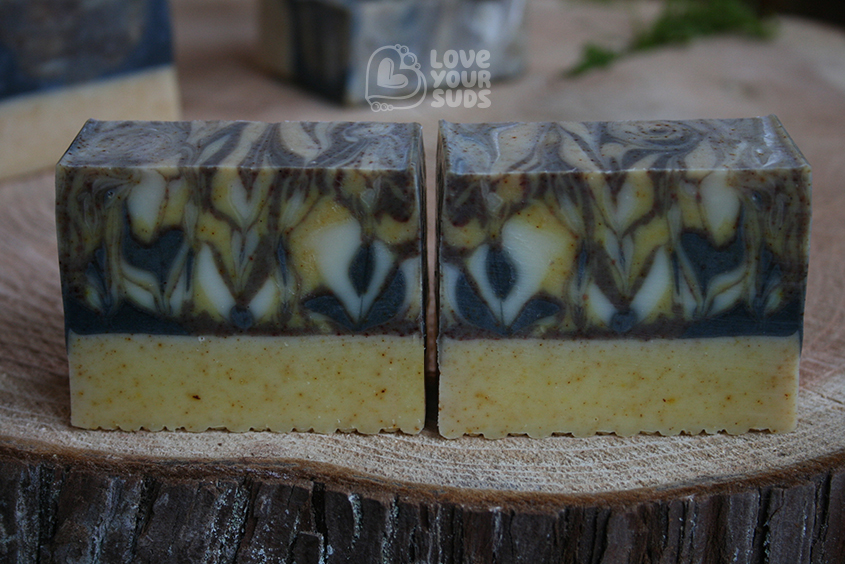
Through researching various types of wood I found myself draw to live edge carpentry and soon stumbled upon Tree Stump Beekeeping. I was immediately intrigued and as I learned more about this ancient and sustainable practice, I decided that I had to incorporate honeycomb into my woodgrain challenge soap. I also liked the idea of creating a woodland forrest scene on the sides of the soap. I do enjoy a challenge! During a visit to Homestead Junction I learned a little more about beekeeping and came across beehive foundation sheets. They feature a pattern that is exactly the same size and shape as honeycomb; it’s what the bees build upon. I decided to buy a sheet and give it a try as an impression matt, cutting it down to fit snugly in the bottom of my soap mold. My next consideration were the colours and I knew I wanted to keep this soap 100% natural. Yellow was a definite inclusion for the honeycomb and a couple of shades of brown were added as follows:
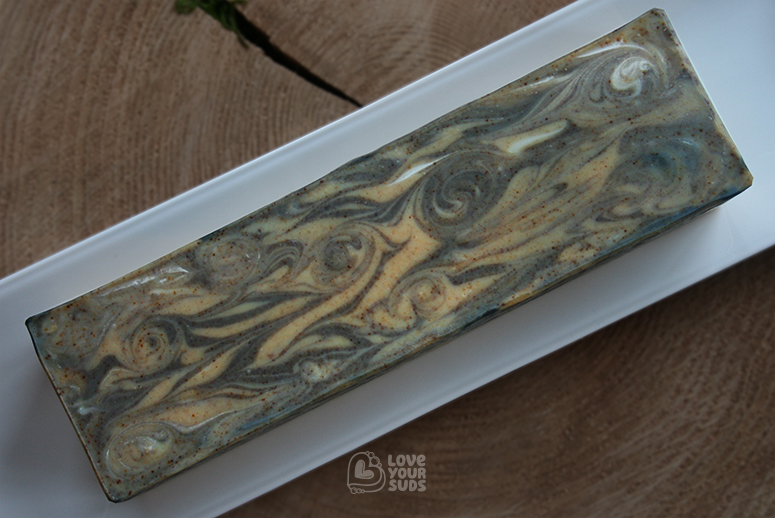
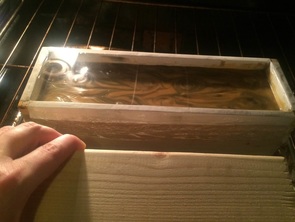
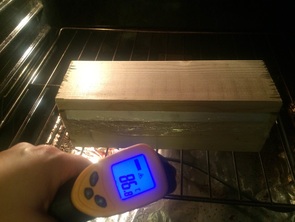
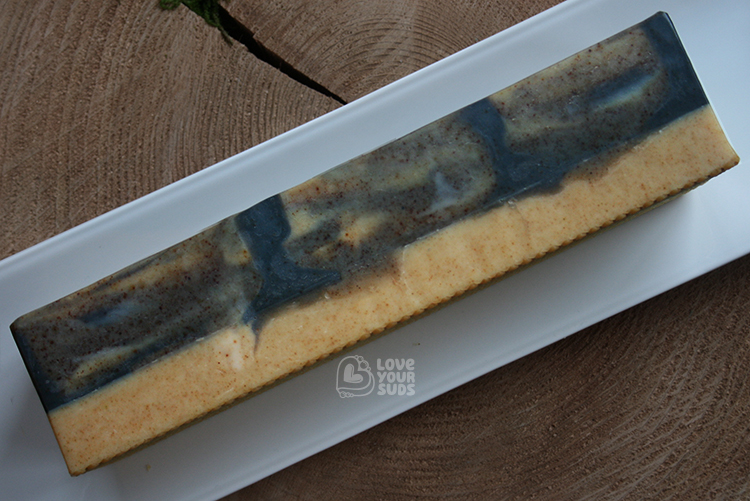
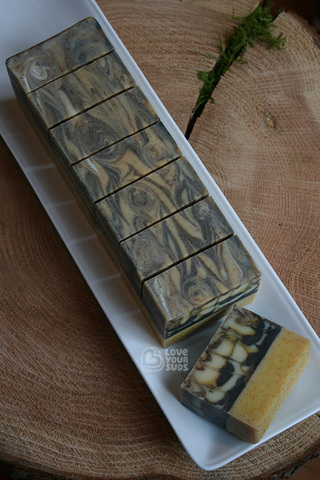
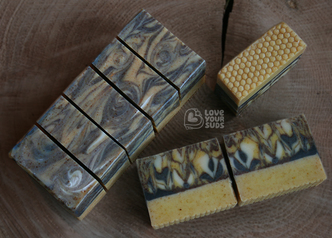
In matching with the theme, a good measure of beeswax (3%) and a dash of honey was added to a standard recipe of coconut oil, olive oil, tallow, grapeseed oil and castor oil with 10% shea butter and some Tussah silk fibres. Fragrance-wise I went with a fresh woody blend of cedarwood, eucalyptus and lavender essential oils (EO). This meant I had to work a little faster as cedarwood can often speed up trace. To test how the EO blend interacted with the batter I separated the project into two stages. Stage one: the honeycomb base. Stage two: the woodgrain layers. Through the Soap Challenge tutorial I learned about a variety of woodgrain pattern techniques. The two that piqued my interest were the freehand technique demonstrated by soap artist and Soap Challenge creator, Amy Warden and the spinning swirl technique demonstrated by Soap artist, Teressa Mahoney. I decided I would attempt the freehand technique, but the first step was to pour the honeycomb base. I used straightforward mix and pour for this layer, before setting the soap aside to firm up overnight. The following day, with the soap mixed and coloured, and squeeze bottles at the ready, I began mixing in the EO blend. I soon noticed that the uncoloured and dark brown batters began to thicken up more quickly. I had freehand poured the EO blend into each batter, so it was likely that I had poured a little more into the uncoloured and dark brown batches, which in turn sped up the trace. With a fast trace looming I quickly switched over to using the spinning swirl technique, pouring the batter directly from the measuring cups into the mold. First up I poured some tree trunks in the corners of the mold and along the sides. I achieved this look by using the dark brown soap batter and pouring it against the side of the mold allowing it to pool slightly at the bottom to create the tree trunk bases. Next, I poured multicoloured pools, alternating the colours as I poured. Each pool was randomly distributed around the mold. I continued pouring and alternating colours until the batter was used up. I was left with a variety of ringed pools that levelled out as they filled up the mold, leaving a space of about half an inch between the top of the soap batter and the top edge of the mold. Next I placed the soap mold onto my lazy susan and began to spinning it from side to side to distribute the layered rings of colour into a woodgrain-like pattern. It worked surprising well even with the different batter consistencies. I then used wood skewer with the flat end facing down, dragging it back and forth in the direction of the long edge to accentuate the woodgrain lines. To create the knots I used the skewer again, this time with the pointy end down and moving the skewer in small circular motions for each knot; clockwise then anticlockwise. Since I was using natural colours I really wanted my soap to gel. Gelling happens when heat is generated during the saponification process. With some encouragement and/or insulation, the soap heats up to a point where it takes on a gel-like consistency. Gelling your soap generally results in brighter, more saturated colours – this was what I was after. To ensure my soap gelled I covered it with plastic wrap and a wood lid, then I placed it into a preheated oven (around 90 deg. celsius) checking every five to 10 minutes for around 30 minutes, to ensure that no volcanos occurred (more on that here from Brambleberry). With everything looking safe and sound I turned off the heat and left the soap in the oven to slowly cool overnight. After another 24 hours of undisturbed curing, the soap was ready to unmold. With bated breath I removed the honeycomb impression sheet – and success! I was so pleased that it worked. With a few minutes to spare I quickly inspected all the elements: The woodgrain top, the woodland forest scene on the sides and honeycomb base before setting the soap aside and heading off to work for the day. Slicing would happen when I returned home in the afternoon. When the end of the day arrived I was excited to return home so I could slice into the soap log to see how it looked inside. As I made my first slice I was so happy to see how the colours and patterns turned out. I love how everything ties together with the Tree Beekeeping theme: the woodgrain top, the honeycomb base, the woodland forrest scene on the sides and the fact that even the pattern on the inside reminds me of bees. This was another fun challenge and I am thrilled (and relieved) that I managed to find the time in an otherwise busy month to learn about using woodgrain techniques and to make and submit a Soap Challenge soap. Many thanks to Amy for another great challenge, and best of luck to all the Soap Challenge participants. I have been loving the soaps I have seen so far. They are all so beautiful and unique – you are such a creative bunch!
28 Comments
Belinda
15/10/2016 12:51:21 pm
Thank you so much for your feedback, Linda! I really appreciate it xo
Reply
Belinda
15/10/2016 12:52:08 pm
I am so glad you think so, Sly :) Thanks so much for posting!
Reply
Helene
15/10/2016 05:13:46 am
Lovely soap! I love the beehive effect you achieved with the foundation sheets. So unique!
Reply
Belinda
15/10/2016 12:53:03 pm
I am so grateful for you feedback, Helene. Thank you xo
Reply
15/10/2016 11:20:01 am
I love how detailed you are throughout the entire blog post, including links where ever possible. Those beehive foundation sheets gave your soap such a beautiful impression! Better than some impression mats I've seen. I especially enjoyed reading about how you switched gears quickly to another technique once noticing that your batter was thickening. Love the clean layers in combination with the wood grain. :)
Reply
Belinda
15/10/2016 12:55:28 pm
I'm so glad you enjoyed my blog post, Lisa :) and thanks you so much for the lovely feedback xo
Reply
15/10/2016 11:45:46 am
Really neat - love all the elements you were able to incorporate. I suppose tree stump beekeeping would be an ancient practice, and one that would be quite natural! I've not heard of the beehive foundation sheets, but they really worked wonderfully as impression mats! Will they be reusable? Love your soap!
Reply
Belinda
15/10/2016 12:59:06 pm
Thanks you so much, Amy! for both your feedback and for creating such a great challenge xo I was intrigued when I discovered the foundation sheets and knew they would create a lovely texture. They are a little tricker to use because they are made from a more rigid plastic material. The best part though, is that they are completely reusable and very durable.
Reply
15/10/2016 12:00:12 pm
What a gorgeous combination of the two sides!!! Beautiful all the way around!!!
Reply
Belinda
15/10/2016 12:59:55 pm
Thanks so much for stopping by to say, Sara! xo
Reply
Belinda
15/10/2016 01:00:44 pm
I really appreciate your feedback, Priya! All the best to you as well xo
Reply
16/10/2016 04:42:05 pm
Such incredible creativity, Belinda! I love how unique this turned out. Thank you so much for sharing your process with us. It was wonderful to read! Fantastic job!
Reply
Ammu
16/10/2016 09:30:07 pm
Such a beautifully imagined and designed soap, Belinda! Love the colours and the story behind the soap..really enjoyed reading through! Thank you for sharing the process..being a relatively inexperienced soaper myself, it's amazing to get insights from experienced soapers!
Reply
Nicole
17/10/2016 12:13:00 pm
Very Cool - Love how you incorporated your three designs into one :)
Reply
Michelle Rogerson
17/10/2016 02:26:36 pm
This is so wonderfully creative - I love what you did with them! Very pretty bars. :)
Reply
30/12/2016 01:06:02 am
Belinda,
Reply
Hi Roberta, Although there is a "best before" timeframe, letting one layer set (a little) before pouring the next is perfectly fine. There are a few factors to consider, but the main two are the recipe: using similar ingredients works best; and the temperature: I use the oven to ensure the soap reaches gel phase. Happy soaping!
Reply
Your comment will be posted after it is approved.
Leave a Reply. |
About the authorBelinda Williams is a creative at heart who loves to practice the art of soap making. Archives
June 2020
Categories |
|
Copyright © 2017-2023 Love Your Suds.
|

